GALLERY
POWERWASHING
Before

After


Here are before and after pictures of a deck that was powerwashed. Also, we powerwash homes. (Pictures up above)
Before
FLOORING
After


In the Before picture, had to pull back carpet, then had to open up floor to find floor joist that was bad. Reinforced with another joist and supported it with 4x4 and footing. Replaced flooring and carpet that is shown in the After picture.


In the Before picture, the old flooring was removed and a mastic was placed on the floor, then as shown in the After picture, the new vinyl floor was installed with toilet and vanity.


In this project, removed old floor and underlayment and then installed new cement board underlayment and new ceramic tile.


This project consists of removing ceramic tile in entryway and kitchen and then installing a vinyl floating floor shown above.


Carpeting and a one piece vinyl floor was removed in this project and then installed laminate floating floor.


This project consists of the removal of a toilet and a sink and old tile and underlayment. In the After picture, you will see a newly installed ceramic tile floor, new toilet, vanity and sink.
This project consisted of a plain fence, which as you can see in the above picture, I also paint fences.
PAINTING
Before


After


This project I had to scrape the old paint off of the garage and then I primed and then painted, as you can see in the finished After photo.
DRYWALL WORK
Before

After

This wall had mold, for which I had to remove and replace with new drywall, tape, mud, primed and then painted, as you can see in the After picture.


Removed damaged drywall, replaced with new drywall, primed and painted and then made new wider ledge to use as an eating area.
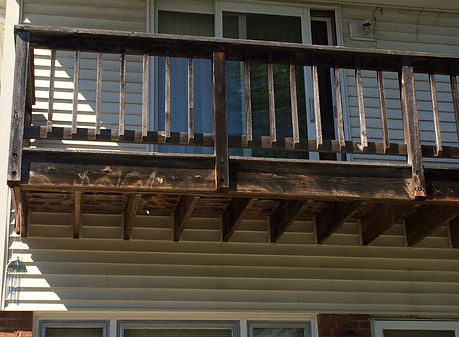
Before
CARPENTRY
After


In the Before picture, I removed the rotted facia board and top molding and replaced with new facia and molding as you will see in the After picture.


On this sliding glass door, I removed the pressboard trim, which was the wrong material that was put on, and replaced it with new brick molding trim around the door.


This project consisted of me needing to replace the window ceil. I began with removing the siding around the window and then found that the facia boards underneath the siding were rotted. I replaced the window ceil, facia boards and reinstalled the siding.


In these photos, the client asked me to install closet doors due to the fact that there weren't any in the master bedroom.


In these photos, to save the client money, I cut out the rotted door frame and replaced with new wood. This way they did not have to buy a new door.


I removed the old water damaged ceiling then I replaced it with a new ceiling and light.


The client had carpeting on their stairs, but did not want it anymore, so I suggested to save the client money, "How about we sand the stairs and stain them to see if they like it". They were pleased with the look, so I suggest to the client "To enhance the look of the stairs, how about putting nice stair treads and paint the kick plates". They were very pleased.
PAVERS
Before

After

For this project, I removed the old paver walkway and redesigned a new one and used the old pavers to save the client money and installed the walkway.
Me, Myself and I Handymen, Inc.
No Job Too Small~
Fully Insured
Marv Babcock
Owner